
Views: 0 Author: Site Editor Publish Time: 2026-07-07 Origin: Site

The specification of mosaic tiles represents a critical intersection in architectural design where high-impact aesthetic vision meets rigorous structural demands. Selecting the wrong material often leads to premature installation failure. Underestimating substrate requirements causes delamination and moisture intrusion, while mismanaging the sourcing process creates significant project delays. You must bridge the gap between artistic intent and long-term durability. Project stakeholders must carefully evaluate mosaic materials based on environmental exposure rather than just visual appeal. You need to master artistic layout principles and assess installation realities on the job site. Navigating sourcing options from custom fabricators to wholesale distributors requires strategic planning. This guide provides the technical framework needed to execute flawless mosaic installations across demanding environments, ensuring your surfaces withstand daily wear while maintaining their intended design integrity.
Material Dictates Application: The choice between glass, stone, and decorative ceramic tiles must be driven by environmental factors (moisture, traffic, chemical exposure) rather than aesthetics alone.
Artistic Control Requires Technical Precision: Controlling layout flow (andamento) and testing scale through physical mockups is critical to achieving cohesive visual designs in large-scale spaces.
Substrate Integrity is Non-Negotiable: Even premium mosaics will fail without proper substrate selection, waterproofing, and movement joint planning across diverse framing backings.
Sourcing Strategy Impacts ROI: Balancing custom mosaic tiles for focal points with wholesale mosaic tiles for scale requires careful vetting of manufacturer capabilities, batch consistency, and lead times.
Grout is a Structural Component: The ratio of grout to tile in mosaics means grout selection (epoxy vs. cementitious) fundamentally alters the surface's performance and maintenance lifecycle.
Establishing the exact environmental demands of the installation site is your first critical step. You must define performance baselines before selecting any surface material. Consider the dynamic loads the surface will endure daily. Evaluate thermal expansion parameters for exterior or sun-exposed applications. Continuous moisture exposure dictates specific porosity limits for your materials. Failing to define these baselines results in rapid surface degradation. When you walk a job site, look at the expansion joints and structural movement expectations. These factors dictate how the tile assembly will perform over the next decade.
You will constantly balance aesthetic desires against functional trade-offs. Intricate artistic patterns look stunning but often complicate maintenance protocols. Slip resistance remains paramount in commercial flooring applications. You must verify Dynamic Coefficient of Friction (DCOF) ratings for all floor-bound materials. High-traffic commercial spaces require strict sanitation standards. Intricate grout lines can trap debris if not properly sealed and maintained. Choose materials that align with the facility's daily maintenance capabilities. A beautiful floor that cannot be cleaned efficiently becomes a liability immediately after handover.
Understanding the mechanical properties of the tile assembly is non-negotiable. You have to look at the entire system, from the framing to the final grout joint. If the subfloor deflects under heavy rolling loads, the rigid tile layer will crack. You need to calculate the expected live and dead loads. Specify the correct mortar coverage, which should be at least 95% for wet areas and exterior applications. Anything less leaves voids where water can accumulate, freeze, and pop the tiles right off the substrate.
Moisture management requires a comprehensive approach. You cannot rely on the tile and grout to waterproof the structure. The waterproofing membrane must be continuous and properly integrated with the drain assembly. When specifying materials for a commercial shower or a pool deck, the membrane selection is just as important as the tile itself. Liquid-applied membranes offer seamless protection, while sheet membranes provide uniform thickness. Your choice depends on the complexity of the substrate and the project timeline.
Decorative ceramic tiles offer moderate durability and high aesthetic versatility. Installers appreciate the ease of cutting and shaping these materials for bespoke patterns. They serve exceptionally well in low-traffic vertical applications. Historical restorations frequently rely on ceramic materials to match legacy designs. They excel as decorative borders and in dry-area artistic installations. However, their higher water absorption rates limit their application scope. You must avoid using standard ceramics in freeze-thaw environments. Submerged applications require specifically glazed and rated ceramic products to prevent water logging.
When working with ceramic mosaics, pay close attention to the glaze quality. Crazing, which appears as fine cracks in the glaze, can occur if the tile is subjected to thermal shock or moisture expansion. This is why you must verify the manufacturer's specifications regarding moisture expansion limits. If you are installing these in a commercial kitchen or a high-humidity environment, ensure the glaze is formulated to withstand constant vapor transmission without breaking down.
The backing material on ceramic sheets also requires scrutiny. Many manufacturers use a mesh backing held together by water-soluble glue. If your installer uses a highly modified thin-set with a long open time, the moisture in the mortar can dissolve the glue before the thin-set cures. This causes the individual tesserae to sag and lose their alignment. Always specify alkali-resistant fiberglass mesh with a water-resistant adhesive for the backing.
Glass and natural stone present entirely different performance profiles. Glass offers zero water absorption and excellent chemical resistance. Stone provides unmatched organic texture and natural variation. Glass dominates wet areas and chemical-heavy environments like pools and spas. Stone elevates high-end residential spaces and low-moisture commercial accents. Both materials carry strict installation limitations. Glass requires highly specific, flexible thin-sets. Standard mortars cause thermal shock cracking in glass installations. Stone remains highly susceptible to staining and acid etching. You must implement rigorous, ongoing sealing protocols for natural stone surfaces.
Installing glass mosaics requires a bright white, highly modified thin-set. Gray mortar will bleed through translucent glass, ruining the intended color. You also need to manage the trowel ridges. Installers must knock down the ridges to create a smooth, uniform bed of mortar before embedding the glass sheets. If they fail to do this, the trowel lines will be visible through the tile. Furthermore, glass expands and contracts significantly more than ceramic or stone. You must incorporate soft movement joints at all changes in plane and every 8 to 12 feet in continuous fields.
Natural stone mosaics demand a completely different approach. Marbles, travertines, and limestones are porous and reactive. You cannot use acidic cleaners on these surfaces, or you will etch the finish. Before grouting, the stone must be sealed with a high-quality penetrating sealer. This prevents the grout pigments from permanently staining the stone. If you are using a contrasting grout color, this step is absolutely critical. Test the sealer and grout combination on a loose sheet before applying it to the wall.
Stone density also affects the installation. Softer stones like limestone can be scratched easily by sanded grout. You must specify unsanded grout or a specialized epoxy grout designed for delicate surfaces. The weight of stone mosaics also requires a robust substrate. A standard drywall installation will fail under the dead load of a heavy marble mosaic. You need cement backer board or a reinforced mortar bed to support the weight safely.
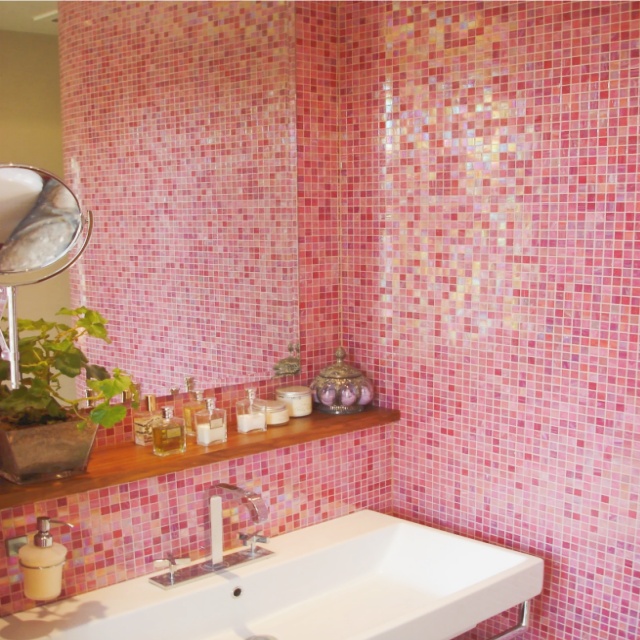
High-durability porcelain stands as the most versatile option for demanding environments. It remains virtually impervious to water with less than 0.5% absorption. The material resists severe abrasion while mimicking the look of stone or wood. Partnering with a reliable porcelain mosaic tile manufacturer ensures commercial-grade durability. You must evaluate their firing processes and edge-finishing techniques. Inspect the mesh-backing quality carefully. Poor mesh glue dissolves during installation, causing alignment failures. High-quality manufacturing guarantees the material withstands heavy commercial use.
Porcelain mosaics are fired at extremely high temperatures, resulting in a dense, hard body. This makes them incredibly difficult to cut. Installers need continuous-rim diamond blades specifically designed for porcelain to prevent chipping the edges. When specifying porcelain for wet areas, look for unglazed or textured finishes that provide adequate slip resistance. The small size of the mosaic pieces naturally increases traction due to the high number of grout joints, but the tile surface itself must still meet safety standards.
Because porcelain is so dense, it does not absorb moisture from the thin-set. This means the mortar must cure entirely through hydration rather than drying out. You must use a polymer-modified thin-set that is formulated for impervious tiles. If you use a standard dry-set mortar, the bond will be weak, and the tiles will eventually pop loose. Pay attention to the curing times, especially in cool or humid environments, as the lack of absorption extends the time needed for the mortar to reach full strength.
Material Type | Water Absorption | Primary Best Use | Key Limitation |
|---|---|---|---|
Ceramic | Moderate to High | Vertical accents, dry areas | Unsuitable for freeze-thaw climates |
Glass | Zero (Impervious) | Pools, showers, chemical areas | Requires specialized flexible thin-set |
Natural Stone | Variable (Porous) | Luxury residential, dry floors | Requires strict sealing and maintenance |
Porcelain | < 0.5% (Impervious) | High-traffic commercial, wet areas | Requires specialized cutting tools |
Understanding tesserae selection is fundamental to mosaic artistry. Individual cut pieces interact to create gradients and visual depth. You are essentially painting with stone or glass on architectural surfaces. Color blending requires a deep understanding of light interaction. The angle of the light source dramatically alters the appearance of glass tesserae. Mix matte and gloss finishes to create subtle textural contrasts. When you review a design, consider how the ambient and directional lighting will hit the surface at different times of the day.
Andamento dictates the visual flow of your installation. You must specify the flow direction and rhythm of the grout joints. This technique guides the eye and frames specific design elements. Proper andamento manages visual distortion over large-scale installations. Determine optimal joint spacing early in the design phase. Consistent spacing ensures clean transitions and pattern continuity. It maintains structural alignment across expansive surface areas. Poor spacing disrupts the visual harmony and weakens the grout matrix.
The scale of the mosaic must relate to the viewing distance. A highly detailed, intricate pattern will look like a muddy blur if viewed from fifty feet away. Conversely, a large, blocky design will feel overwhelming in a small, enclosed space. You need to scale the tesserae size to match the architectural volume. For large exterior murals, you can use larger pieces and wider grout joints. For intimate interior spaces, smaller pieces and tighter joints create the necessary refinement.
Color theory plays a massive role in mosaic design. You are not just picking colors; you are managing optical mixing. When two different colored tiles are placed next to each other, the human eye blends them from a distance. If you place a bright red tile next to a bright green tile, they will vibrate visually and create a muddy brown effect from afar. You must use transitional colors to bridge stark contrasts and create smooth gradients. This requires a sophisticated understanding of the color wheel and material properties.
Integrating mosaic wall tiles transforms standard vertical surfaces into architectural focal points. Use them strategically for wayfinding in complex commercial layouts. They establish strong brand identity in corporate lobbies. Design custom borders to frame larger-format tile installations. This creates a cohesive transition between disparate surface materials. Always assess the dead load of dense stone or thick glass. Select appropriate non-sag mortars to prevent vertical slippage during the curing process.
When designing feature walls, consider the termination points. How does the mosaic meet the ceiling, the floor, or adjacent walls? You cannot just leave a raw edge. Specify metal profile trims, bullnose tiles, or architectural moldings to frame the installation cleanly. The transition details separate amateur work from professional execution. If the wall has outside corners, you must plan how the mosaic will wrap around them. Mitered cuts on tiny mosaic pieces are incredibly difficult, so profile trims are usually the best solution.
Lighting integration is another critical factor for wall applications. Wall-grazing light fixtures will highlight every single imperfection in the installation. If the substrate is not perfectly plumb and flat, the lighting will cast harsh shadows across the uneven tiles. You must specify a Level 5 drywall finish or a perfectly screeded mortar bed for illuminated mosaic walls. The installer must use a straightedge constantly to ensure the surface remains perfectly planar as they set the sheets.
Mosaic flooring provides a distinct mechanical advantage in wet areas. The high density of grout joints inherently increases slip resistance. This characteristic makes mosaics ideal for ADA-compliant showers and pool decks. Small-format tiles conform easily to complex, multi-directional slopes. Large tiles require awkward envelope cuts to achieve proper drainage. Mosaics follow the substrate contours smoothly. This ensures water flows directly to the drain without pooling.
In commercial kitchens and industrial wet areas, the grout selection is just as important as the tile. Cementitious grout will degrade rapidly when exposed to harsh cleaning chemicals and organic acids. You must specify a 100% solids epoxy grout for these environments. Epoxy grout is non-porous, highly chemical resistant, and incredibly durable. It prevents water and contaminants from penetrating the tile assembly and attacking the substrate below.
Expansion joints in flooring are critical. You must honor all structural movement joints in the concrete slab through the tile assembly. Do not tile over a control joint. The movement will tear the mosaic apart. Use a flexible sealant that matches the grout color to fill these joints. In large continuous floors, you need to install movement joints every 20 to 25 feet, and closer if the floor is exposed to direct sunlight or significant temperature swings.
Reserve custom mosaic tiles for high-visibility focal points. Murals, brand logos, and bespoke gradients demand custom fabrication. Assess fabricators based on their digital rendering accuracy. Verify their color-matching capabilities before approving production. Review their pre-assembly and mapping processes carefully. A well-mapped custom mosaic saves days of installation labor. Factor in extended lead times, which often stretch from 8 to 16 weeks. Always order a 15-20% overage for complex patterns to mitigate site damage risks.
When working with custom fabricators, demand a physical strike-off sample. A digital rendering cannot accurately convey the texture, gloss, and true color of the physical materials. The strike-off is a small section of the actual mosaic, produced using the specified materials. You use this sample to verify the color palette under the actual site lighting. Do not approve full production until the strike-off is signed off by all stakeholders.
The mapping and labeling system provided by the fabricator is crucial for the installation team. A custom mural arrives in dozens or hundreds of individual sheets. If the labeling system is confusing or the map is inaccurate, the installation will turn into a nightmare. The fabricator should provide a clear, grid-based map with corresponding labels on the back of every sheet. The sheets should also have directional arrows to ensure they are oriented correctly on the wall.
Leverage wholesale mosaic tiles for large-scale applications to control project budgets. Multi-unit residential builds and hospitality corridors require volume procurement. You must audit wholesale suppliers rigorously. Check for batch-to-batch color consistency across large orders. Inspect the mesh-backing integrity to avoid water-soluble glues. Soluble glues fail when exposed to wet thin-set, ruining the sheet alignment. Verify the supplier's inventory forecasting to prevent mid-project material shortages.
When ordering wholesale, you must manage the shade variations. Ceramic and porcelain tiles are produced in batches, and each batch has a slightly different shade or caliber (size). You must ensure that all the material for a single continuous area comes from the same batch. If you mix batches, the color shift will be obvious. Require the supplier to guarantee single-batch fulfillment for your order, and verify the batch numbers on the boxes when the material arrives on site.
Quality control on wholesale orders also involves checking the sheet dimensions. If the mosaic sheets are not perfectly square, the grout joints between the sheets will be wider or narrower than the joints within the sheets. This creates a visible grid pattern on the finished surface, which looks terrible. Pull several sheets from different boxes and lay them out dry on the floor. Check the alignment and the joint spacing before the installer mixes any thin-set.
The substrate dictates the entire lifespan of your mosaic installation. Even premium materials fail on compromised backings. Evaluate cement board, waterproof foam boards, and uncoupling membranes based on site conditions. Select easy-to-access, lightweight substrates for complex vertical installations. Curved surfaces require highly adaptable backing materials. Ensure the subfloor meets stringent deflection criteria. Stone mosaics typically require L/720 deflection limits. Excessive movement fractures both the grout and the tile.
Surface preparation is where most installations fail. The substrate must be clean, dry, and free of any contaminants like dust, oil, or curing compounds. If you are installing over concrete, you must check the moisture vapor emission rate (MVER). High moisture levels will destroy the thin-set bond. Use a surface profiler to ensure the concrete has the correct texture for the mortar to grip. If the surface is too smooth, you must scarify or grind it before installation.
Flatness is critical for mosaics. Because the tiles are small, they will follow every bump and dip in the substrate. The industry standard requires the substrate to be flat within 1/4 inch over 10 feet. For glass mosaics, the tolerance is even tighter: 1/8 inch over 10 feet. You cannot use thin-set to level a bad substrate. The installer must use a self-leveling underlayment on floors or a rendering mortar on walls to achieve the required flatness before setting the tile.
Never skip the physical mockup phase. A small-scale study validates your design and color choices in real-world conditions. Verify how glass transparency and grout colors interact under the site's specific lighting. Conduct diagnostic cutting and spacing tests during the mockup. Evaluate the installer's cutting techniques and thin-set coverage. Check spacing alignment before authorizing full-scale field application. Fixing errors on a mockup costs a fraction of tearing out a failed installation.
The mockup should include all the components of the final assembly. This means the actual substrate, the waterproofing membrane, the specified thin-set, the tile, and the grout. Do not let the installer build the mockup on a piece of scrap plywood if the actual installation is going over concrete. You need to test the entire system. Once the mockup is cured, perform a bond test by trying to pry a few tiles off. This verifies that the thin-set is achieving the required adhesion.
Use the mockup to establish the standard of quality for the project. Have the architect, the designer, and the client review and sign off on the mockup. Leave the mockup on site for the duration of the project. If there is a dispute later about the quality of the field installation, you can refer back to the approved mockup as the benchmark. This protects both the design team and the installation contractor.
Premium, highly modified thin-sets are mandatory for modern installations. Non-porous glass and porcelain require specific polymer additives to achieve a mechanical bond. Evaluate your grout options based on traffic and chemical exposure. Epoxy grout carries a higher upfront labor cost. However, it provides superior stain resistance and structural rigidity. Cementitious grout works well in dry, low-traffic areas but requires periodic sealing. The high ratio of grout to tile in mosaics makes this selection critical to surface longevity.
When mixing thin-set, the water ratio is critical. Installers must measure the water exactly according to the manufacturer's instructions. Adding too much water makes the mortar easier to spread but severely weakens the final bond strength. The mortar must be mixed, allowed to slake for the specified time, and then remixed. Skipping the slaking process prevents the polymers from fully activating, which compromises the flexibility and adhesion of the thin-set.
Grouting mosaics requires specific techniques. Because there are so many joints, the grout tends to dry out quickly on the surface. The installer must work in small sections, packing the grout fully into the joints and cleaning the excess immediately. If the grout is allowed to harden on the face of the tile, it is incredibly difficult to remove, especially on textured stone or unglazed porcelain. Use a specialized grout release agent on porous tiles before grouting to make the cleanup process easier and prevent staining.
Verify the substrate flatness using a 10-foot straightedge before any material is mixed.
Apply the appropriate waterproofing or crack isolation membrane based on the site conditions.
Mix the thin-set mortar strictly according to the manufacturer's water ratio and slaking requirements.
Embed the mosaic sheets, using a grout float to press them firmly into the mortar bed and knock down the trowel ridges.
Clean the grout joints thoroughly before the thin-set cures to ensure the grout can achieve full depth.
To ensure the long-term success of your mosaic installations, follow these critical next steps:
Request physical samples and test them under the exact lighting conditions of your project site.
Demand technical data sheets (TDS) from manufacturers to verify water absorption and DCOF ratings.
Build a physical mockup to test thin-set coverage, grout color interaction, and installer proficiency.
Consult with a qualified tile setter to verify that your substrate meets the required deflection limits.
A: No. Standard ceramic tiles have higher water absorption rates. They are prone to cracking in freeze-thaw conditions and can degrade when submerged. Always specify impervious glass or porcelain rated specifically for pool environments.
A: Glass mosaic cracking usually results from using the wrong thin-set or lacking movement joints. Glass requires highly flexible, polymer-modified thin-set to absorb thermal expansion. Rigid mortars transfer structural stress directly into the glass.
A: Epoxy grout is the superior choice for high-traffic commercial floors. It is non-porous, highly resistant to chemical stains, and provides excellent structural rigidity. It eliminates the need for ongoing grout sealing.
A: Use a premium non-sag mortar specifically formulated for vertical applications. Ensure the mortar is mixed to the exact manufacturer specifications. Avoid adding excess water, which weakens the initial grab strength.
A: Yes, an uncoupling membrane is highly recommended over concrete or wood subfloors. It neutralizes movement stresses between the substrate and the tile layer. This prevents substrate cracks from telegraphing through to your mosaic surface.
